RF-Hub is an excellent solution for conveniently controlling and monitoring 433 MHz devices in Home Assistant. Since the device connects wirelessly, you can place one or more RF-Hubs strategically for optimal coverage in your home.
1. Install RF-Hub
For your RF-Hub to work optimally, it is important that you first connect it to your network. Follow the installation instructions carefully for best results. You can find more information about the installation here: Install RF-HUB.
2. Install the MQTT add-on
Before you can integrate RF-Hub with Home Assistant, you need to install the MQTT add-on. This ensures stable communication.
- Go to Supervisor in Home Assistant.
- Click on Add-on Store.
- Search for Mosquitto broker and install it.
- Configure the settings if needed and then start the add-on.
3. Enable MQTT discovery
After installing the MQTT add-on, you need to enable MQTT discovery in Home Assistant so that devices can be automatically discovered.
- Go to Settings in Home Assistant.
- Select Devices & services.
- Search for MQTT and add it.
- Enable Enable MQTT discovery in the settings.
4. Create a user for RF-Hub
For RF-Hub to communicate securely with Home Assistant, we recommend creating a dedicated user. Follow these steps to create a user named RFHub in Home Assistant:
- Log in to your Home Assistant instance.
- Go to Settings in the sidebar.
- Select Users under People & zones.
- Click the Add user button.
- Enter RFHub as the username.
- Choose an appropriate and secure password and confirm it.
- Select the permissions the user should have (usually this user does not need extensive permissions).
- Click Create to save the user.
5. Configure RF-Hub
Now it is time to connect the RF-Hub to your Home Assistant instance. You will use the information from the MQTT configuration and the newly created user.
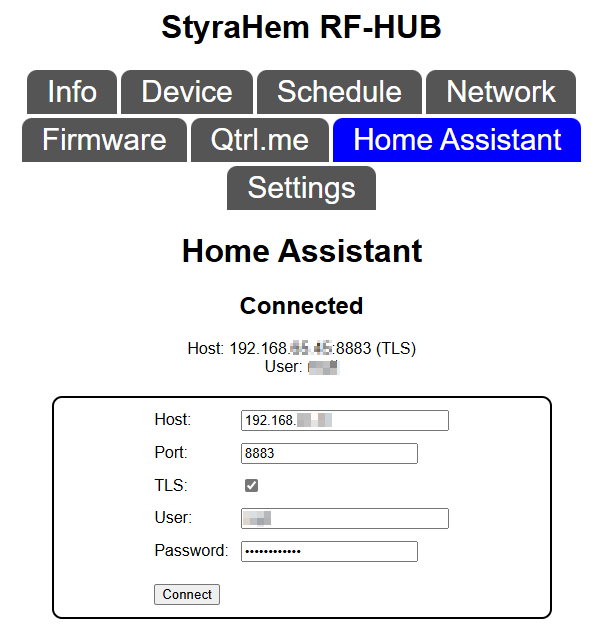
- Open the RF-Hub's web interface and navigate to the Home Assistant tab.
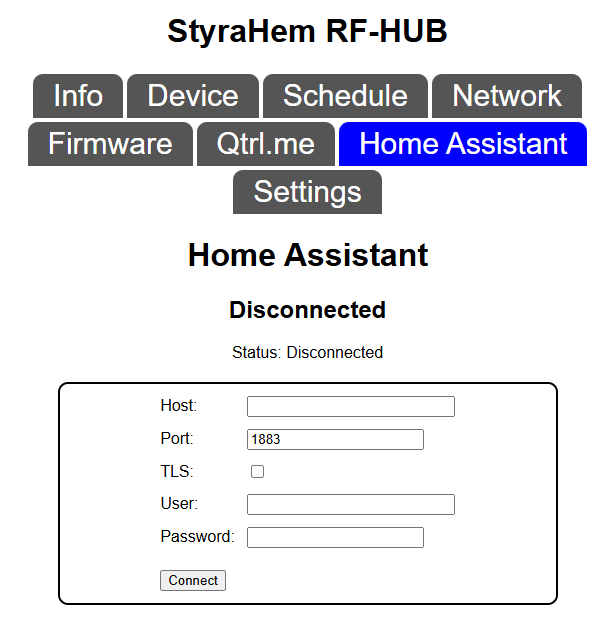
- Fill in the following information:
- Host: Enter the IP address or DNS name of your Home Assistant instance (where the MQTT broker is running).
- Port: The standard port for MQTT is usually
1883or 8883 for TLS. - TLS: Leave this box unchecked unless you have configured TLS/SSL for your MQTT broker.
- User: Enter the username you created for RF-Hub:
RFHub - Password: Enter the password you chose for the user
RFHub.
- Click the Connect button.
After clicking Connect, the RF-Hub attempts to connect to your Home Assistant. If the connection succeeds, the status changes to Connected and your RF-Hub is now ready to use with Home Assistant!