Do you have a 433 MHz remote whose brand isn't in the compatibility list? With CustomMatch — the RF-HUB's universal learning function — you can record any 433 MHz signal and have the RF-HUB transmit it again. The feature works with most simple on/off remotes, garage door openers, alarms and similar devices.
What you need
- An RF-HUB connected to your network
- The remote you want to record
- A web browser on the same network as the RF-HUB
Step 1 — Open the RF-HUB web interface
Open a browser and go to the RF-HUB IP address, e.g. http://192.168.1.50/.
Step 2 — Enable the RF menu
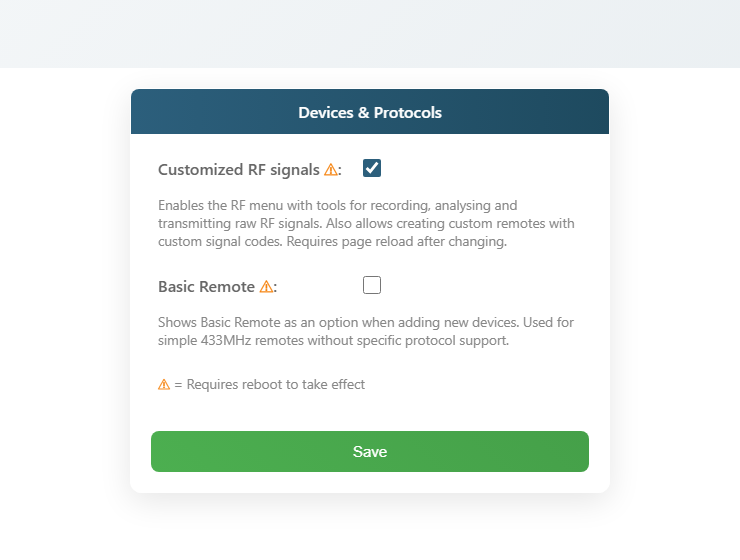
The RF menu is hidden by default. Open Settings → Advanced and tick Custom RF signals. Click Save and reload the page.
Step 3 — Go to the RF tab
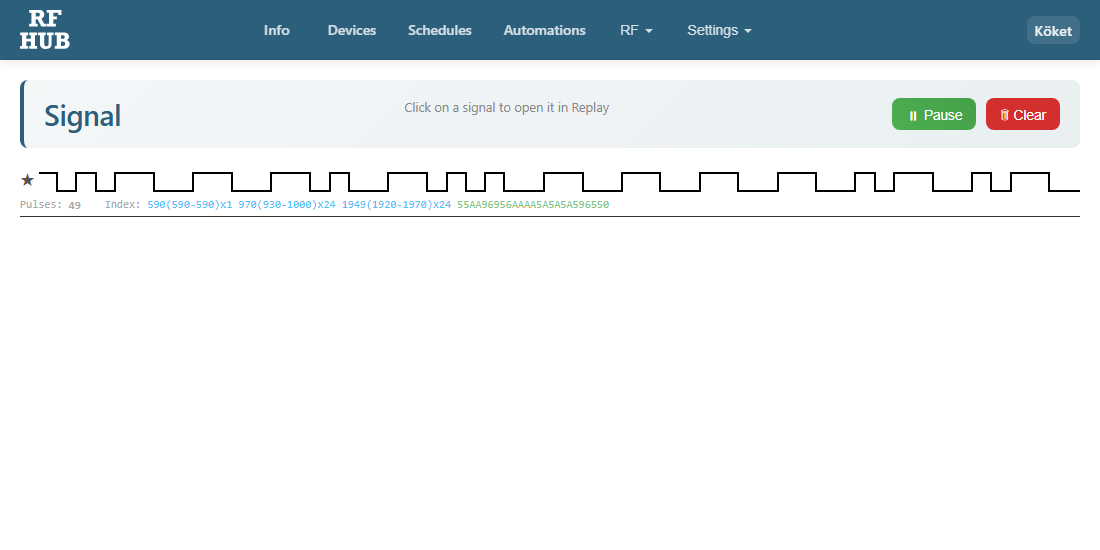
Click Settings → RF in the menu. You'll land on the Record signal page.
Step 4 — Press the remote's button
Hold the remote a few decimetres from the RF-HUB and press the button you want to record. When the RF-HUB receives a signal it appears immediately on the page with timestamp, signal type and a hex string.
Press the same button 2–3 times to confirm that the signal is stable (the same hex value every time).
Quick option — save as a favorite ★
Before you continue — if you want to save the recorded signal permanently without creating a full device, click the star (★) to the left of the signal row. The signal is then added to a favorites list shown in a separate panel on the Replay view.
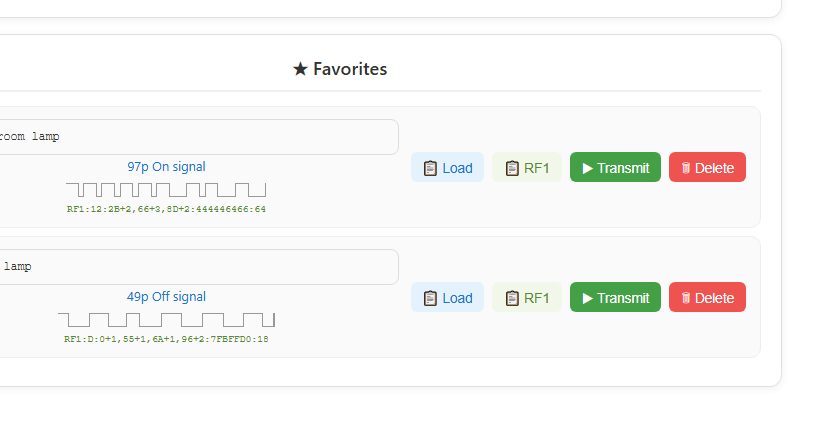
From the favorites panel you can:
- Give each favorite a name (e.g. "Living room lamp") — the name is saved automatically
- Load — copies the hex code to the playback field
- RF1 — copies the RF1 format (for pasting into a CustomMatch device, see Step 7)
- Send — transmits the signal immediately with a single click
- Delete — removes the favorite
Important to know: Favorites are stored in the browser's localStorage, not on the RF-HUB device itself. That means the favorites are tied to the specific browser and computer you saved them from — if you open the interface from a different computer or phone, you won't see the same favorites. For permanent and shareable storage, continue with Steps 5–7 below and save as a CustomMatch device.
Step 5 — Open the signal in "Replay"
Click the recorded signal in the list. The RF-HUB will open the Replay signal page with the signal already filled in to the hex field.
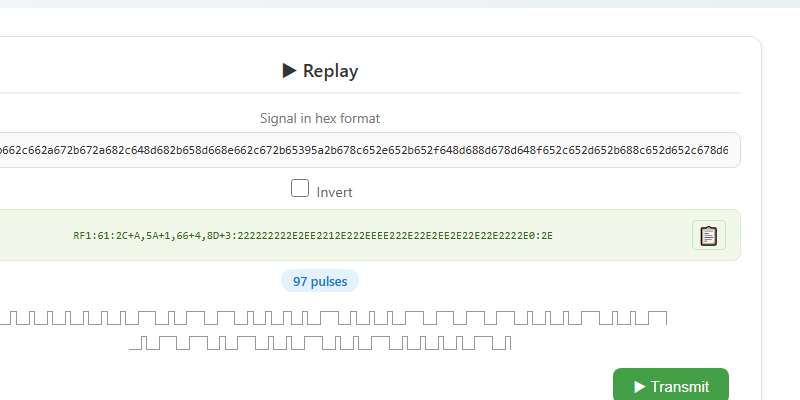
Click Send — if the device reacts (light turns on, gate opens, etc.) the recording works.
Step 6 — Save as a device
To control the device from your phone, automations or Home Assistant you need to save the signal as a device. Go to Devices and click + Add device.
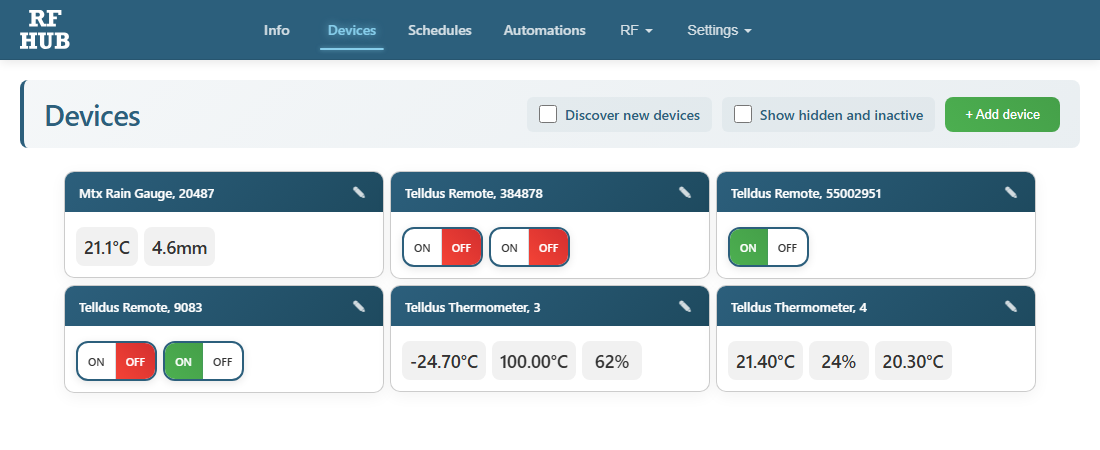
Choose type CustomMatch, give the device a name and paste the hex signal. Save — now you can control the device just like any other RF-HUB device.
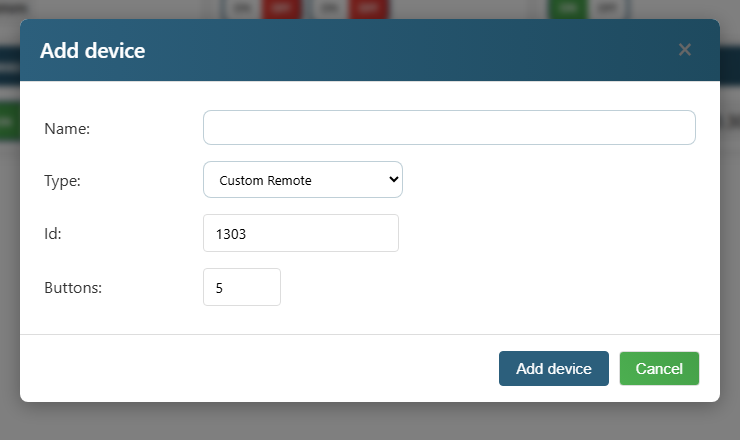
Step 7 — Enter the RF1 code for each button
You now have an empty CustomMatch device with two channels but no signals. Click the pencil (✎) on the device card to open the configuration.
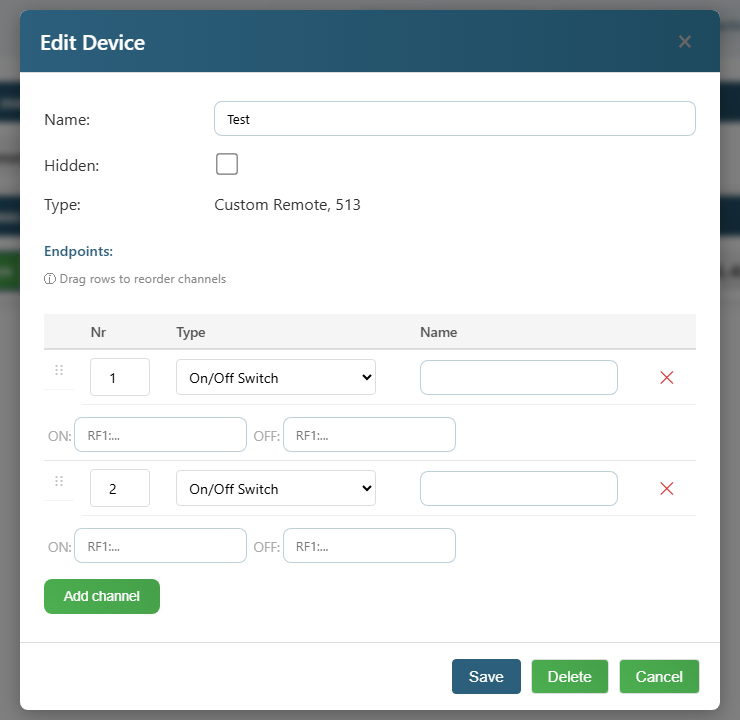
For each channel you fill in two fields:
- ON: Paste the RF1 string corresponding to the ON signal (e.g.
RF1:61:2C+A,5A+1,66+4,8D+3:...). You get it from the Replay view in Step 5 — the green text below the hex field. - OFF: Paste the RF1 string for the OFF signal (if you recorded both ON and OFF as separate signals).
Click Save. Now you can press ON/OFF on the device card and the RF-HUB will transmit the corresponding recorded signal.
Tip — use "Button" instead of "On/Off Switch"
By default each channel is an On/Off Switch that requires two RF1 strings (one for ON, one for OFF) and shows the current state. That's right for a lamp or wall socket you want to be able to switch on and off.
But if you're recording a button that only has one function — e.g. a garage opener, doorbell, alarm button or a momentary button on a remote — then Button is a better channel type. Then only one RF1 field per channel is shown, no state is stored, and the button only transmits the signal when you click it.
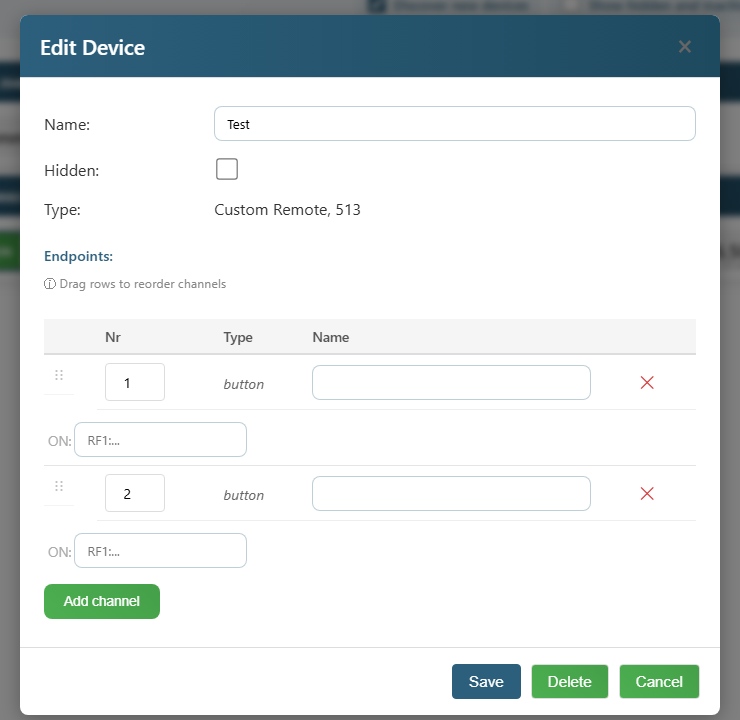
Here's how to change it:
- Open Edit Device (click the pencil ✎ on the device card)
- In each channel — change Type from "On/Off Switch" to Button
- Paste the RF1 string in the single field shown
- Click Save
The device card now shows a simple clickable button instead of an On/Off selector.
If the signal doesn't work — try "Invert"
Some receivers interpret the pulse pattern the other way around — in that case it helps to invert the signal on playback.
- Go back to the Replay view (Step 5)
- Paste the same hex string
- Tick Invert
- Click Send — if the receiver reacts now, the signal was inverted
Did you find that it works with Invert ticked? Then you have to invert the RF1 string yourself before pasting it in Step 7 (swap + for - and vice versa in the RF1 format, or write a ! in front of the sequence — the RF-HUB interprets it as "send inverted").
Tips
- Signal not working? Try several times — some remotes have slightly varying timing. Use the signal that repeats most often.
- Want to control on/off separately? Record the on button and the off button as two different CustomMatch devices.
- Rolling codes (some modern garage doors, car alarms) generally can't be recorded — they change the code on every button press for security reasons. These require the original remote.
- Alarm panels and property locks are often encrypted — always check local regulations before trying to record signals from equipment you don't own.
What happens behind the scenes
CustomMatch captures the actual pulse pattern from the remote's 433 MHz signal and stores it as an RF1 bitmap. When the RF-HUB transmits the signal again the exact same pulse pattern is recreated — the receiver can't tell the difference from the original remote.
For questions — contact us via the contact page.