When you have received your RF-Hub, the first thing you need to do is connect it to your network.
- Connect your RF-Hub to a USB outlet or a USB charger. If your router has a USB output, that can be a good option for connecting your RF-Hub without needing a separate USB charger.
- When you have connected your RF-Hub, it will create a wireless network called StyraHem-RFHUB-XXXXXXXXXXXX.

- Connect your phone or a computer to the wireless network — no password is required as it is an open network.
- Then open your browser and go to
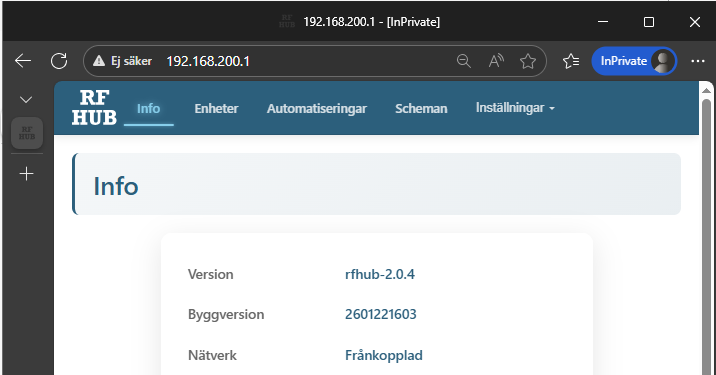
http://192.168.200.1to access the RF-Hub's user interface. - You will now see a web page that looks like this:
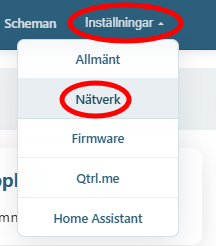
- To connect it to your wireless network, click the Settings tab and choose network.
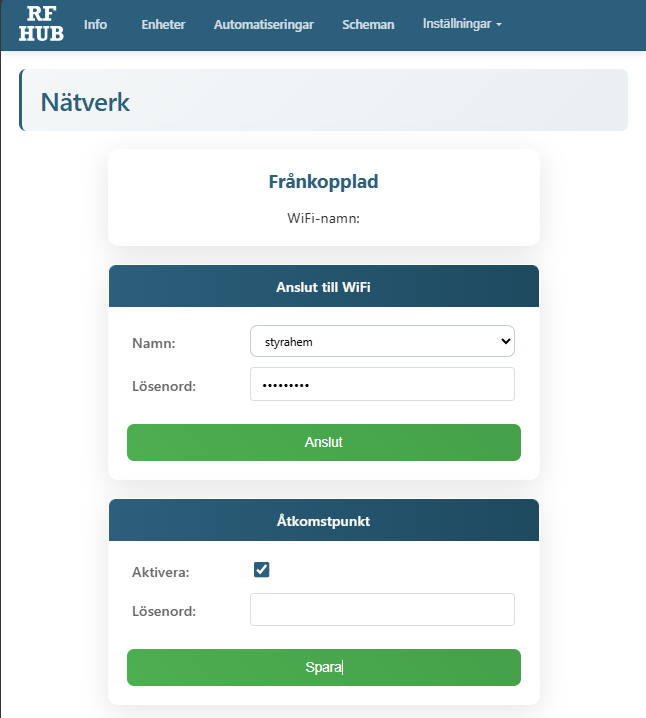
- Select or type the name of your network and the password. Note that it should be a network that supports 2.4 GHz. Then click Connect and after a moment, Disconnected should change to Connected. Then turn off the Access Point or set a password so that no unauthorized person can connect to your device.
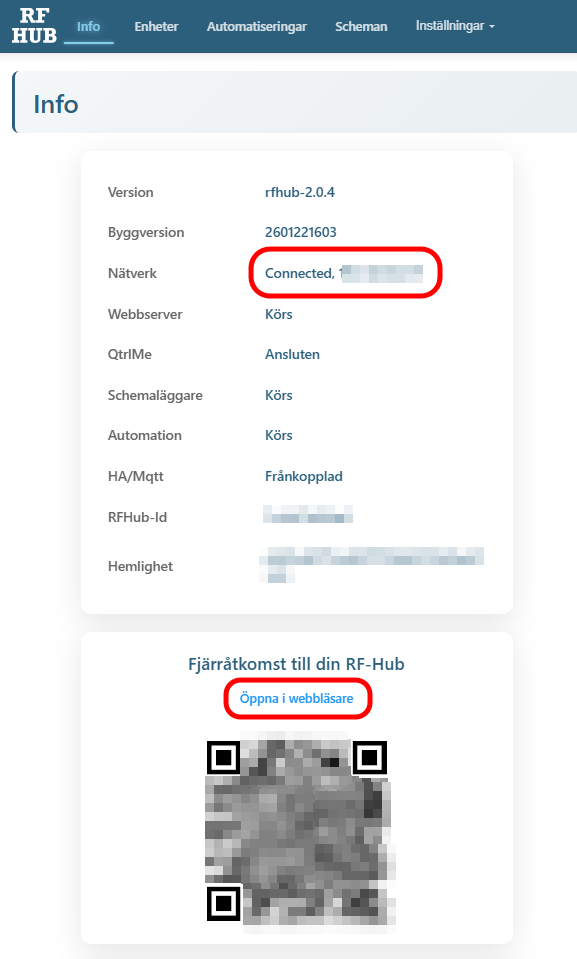
- Now you can go to the Info tab and there you will see that the Network is Connected and the IP address the device has been assigned. You can try connecting your browser to that address to verify everything works. Below you will also find a link that you can use to access your device when you are away from home. Save it as a bookmark or scan it on your phone using the QR code.
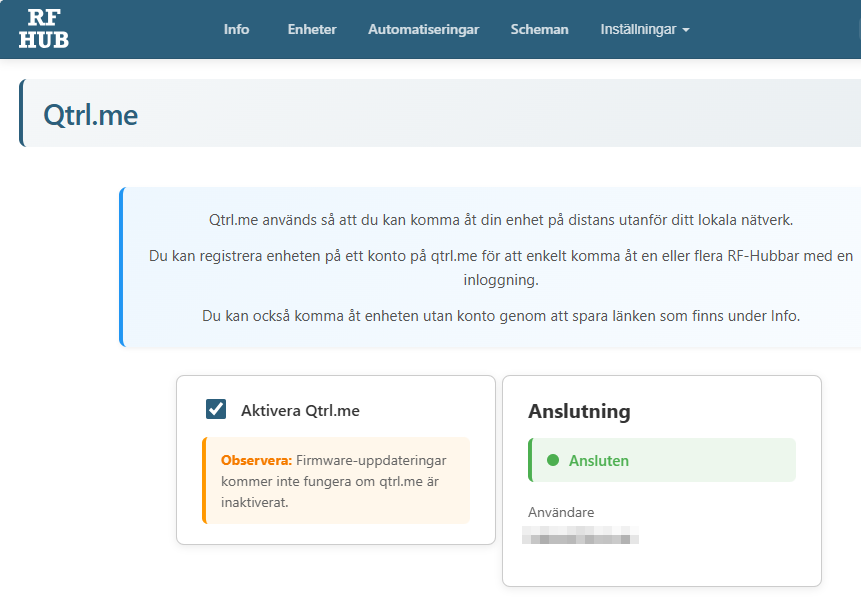
- If you want easy access to your devices, you can create an account on Qtrl.me and then connect your RF-Hub to it. After creating an account on Qtrl.me, go to your RF-Hub under Settings and Qtrl.me and click the link to connect your RF-Hub. Once connected, it will look like this:
- You are now finished with the installation of your RF-Hub!