This guide shows how to pair a standard remote from a known brand (Nexa, Telldus, Proove, HomeEasy and others) with RF-HUB. For brands not in the compatibility list — see the CustomMatch guide instead.
What you need
- An RF-HUB connected to your network
- The remote you want to pair (with a fresh battery)
- A web browser on the same network as the RF-HUB
Two ways to pair — pick the one that suits you
RF-HUB supports two workflows:
- Auto-discovery (easiest) — hold the remote close to the RF-HUB and press a button. The RF-HUB recognises the protocol and adds the remote automatically under Devices.
- Manual pairing — you pick the type and channel yourself, then pair the buttons one at a time.
Auto-discovery
- Open the RF-HUB web interface
- Go to Devices and tick Discover new devices
- Press a button on the remote a few times
- The remote appears automatically in the list with the correct brand and channel
- Click the pencil (✎) to name the buttons
Works with: Telldus, Nexa, Proove, HomeEasy, COCO / KlikAanKlikUit, Trust, Anslut, Sartano, Clas Ohlsson, GAO, Rusta, Kjell & Company, Otis, Arctech, Sonoff RF (on the same protocol), Unitec, RSL366 / Luxorparts, EV1527-based remotes.
Manual pairing
Manual pairing is used above all to create a virtual remote — you have no physical remote, but you still want to control an existing switch, dimmer or receiver that listens to a protocol such as Nexa or Telldus. In that case you create a virtual transmitter in the RF-HUB which the receiver can be taught to recognise.
Other cases where manual pairing fits:
- Auto-discovery does not pick up the signal (weak remote, interference)
- Several remotes trigger at the same time and you want to avoid the wrong ones being picked up
- You already know which brand and channel ID you want to use
- Go to Devices and click + Add device
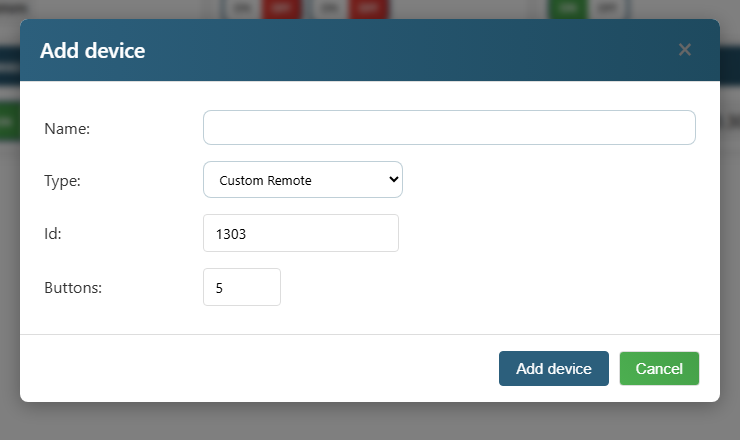
- Choose a Type from the dropdown — e.g. "Telldus Remote", "Nexa Code Switch" or "Basic Remote"
- Set the Id (often auto-generated) and the number of Buttons
- Click Add device — the device appears in the list with empty buttons
- Click the pencil (✎), select one button at a time, then press the matching button on the remote to pair it
The buttons do not work at all
- Range — during pairing, keep the remote within 1-2 metres of the RF-HUB
- Battery — an old remote may send too weak a signal. Replace the battery
- Other interference — see the range troubleshooting guide
- Brand not in the list — use CustomMatch, which records any 433 MHz signal
What do you do with the remote afterwards?
Once the remote is paired, you can:
- Use the buttons as triggers in automations — e.g. button 1 → turn on a lamp (see schedules and automations)
- Send events to Home Assistant via MQTT (auto-discovery)
- Use it in Homey (Pro, Bridge or Cloud) via our Homey app and the qtrl.me cloud